In today’s fast-paced world, remote work has become increasingly prevalent, necessitating the need for seamless workflow and efficient communication. As a result, the demand for Remote Desktop Protocol (RDP) clients for Mac and macOS has grown significantly. This guide aims to provide a step-by-step approach to operating an RDP client on Mac and macOS devices, enabling users to connect to remote Windows PCs effortlessly.
Table of Contents
Understanding RDP
Remote Desktop Protocol (RDP) is a safe network communications protocol that was developed by Microsoft. It allows users to access their physical work desktop computers remotely, providing complete control over the tools and software installed on the remote Windows PC.
RDP enables users to connect to a remote Windows PC via the internet or a local network, sharing peripherals such as keyboards and mice. This protocol is commonly used by individuals working from home or traveling, support technicians diagnosing and repairing systems remotely, and administrators performing system maintenance.
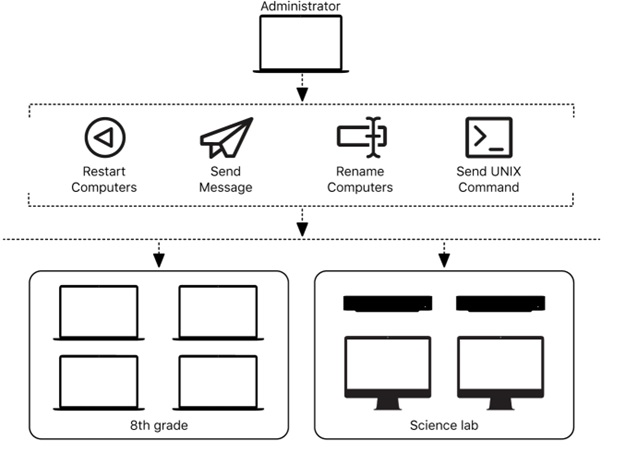
Enabling RDP on Windows
Before establishing an RDP connection from a Mac or macOS device, it is necessary to enable “Remote Desktop” on the Windows PC. Here’s how you can enable Remote Desktop on a Windows PC:
- Start Menu should be opened by clicking the Starts button or pressing the Windows key on your keyboard.
- Click on the Settings button.
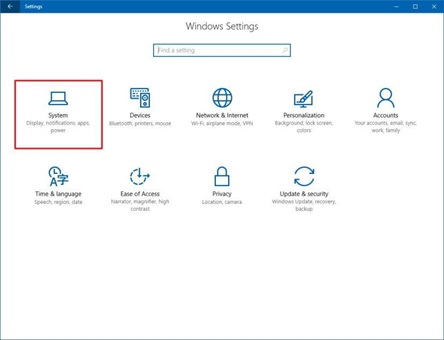
- The System option should be selected from the Windows Settings screen.
- Scroll down the left-side menu and locate “Remote Desktop,” then click on it.
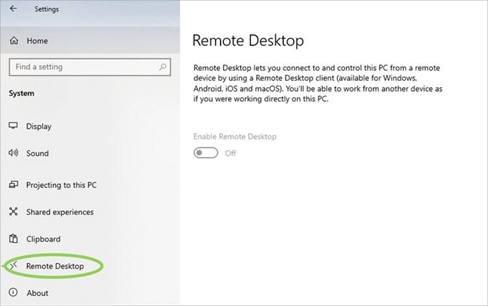
- Toggle the “Enable Remote Desktop” option from off to on to activate It.
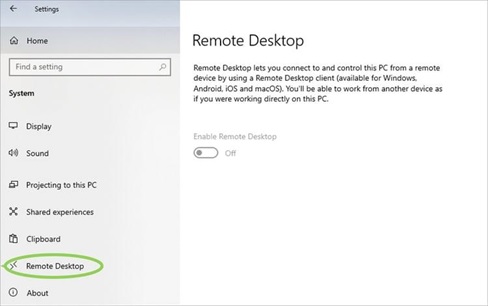
- Take note of the computer’s name mentioned under “How to connect to this PC,” as it will be required when using the Microsoft Remote Desktop app.
- By default, computer administrators are automatically granted remote access. To allow non-administrative users access, manually add them via the “Select users that can remotely access this PC” link.
Once Remote Desktop is enabled on the Windows PC, it will be ready for a Mac-to-PC remote desktop connection.
Choosing an RDP Client For macOS
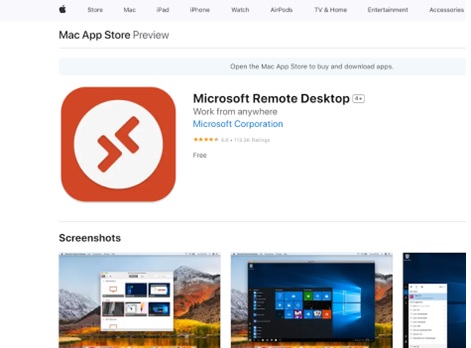
Unlike Windows, macOS does not have a built-in application for establishing RDP connections. Although several options can be found if searched. One popular choice is the Microsoft Remote Desktop app, which can be downloaded from the App Store on your MacBook. Here’s how you can connect through RDP from macOS using the Microsoft Remote Desktop app:
- Open the Microsoft Remote Desktop app on your MacBook.
- Click on the “+” icon to open a drop-down menu, which will display options for adding a PC or a workspace.
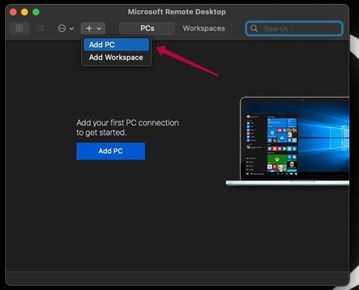
- Select “Add PC” from the drop-down menu.
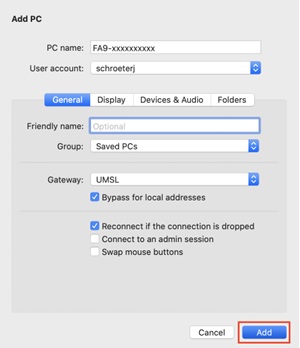
- Enter the IP address of the RDP server into the PC name field. If desired, you can also add a User Account to avoid entering your username and password every time you log in.
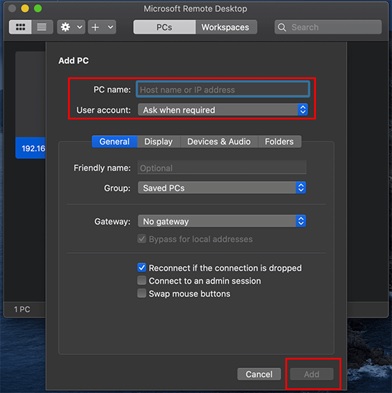
- Input the username and password of the RDP server. Optionally, you can set a “friendly name” for the account being created to remember and manage multiple users easily.
- The “Add” button should be clicked to create the RDP connection, which will appear in the Desktops list on the default interface.
- Right-click on the newly installed connection and select “Connect” to establish the remote connection.
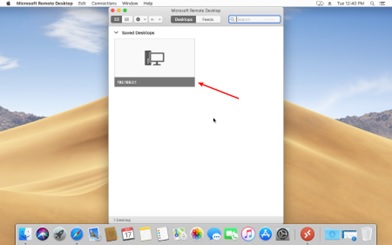
- If prompted, enter your username and password.
- Click “Continue” to gain control of the Windows device from your MacBook.

Congratulations! You have successfully connected to a Windows PC using an RDP client on your macOS device.
Establishing a Secure RDP Connection
When enabling an RDP connection, it is crucial to prioritize security and take necessary precautions to prevent any potential vulnerabilities. Here are some steps to establish a secure RDP connection:
- Use a Strong Password: Ensure that all accounts with access to Remote Desktop have strong passwords, consisting of at least eight characters with a combination of letters, numbers, and special characters. Avoid using old passwords and consider utilizing a password manager for better management.
- Enable Network Level Authentication (NLA): Network Level Authentication adds an extra layer of authentication before establishing a connection. It is recommended to leave this feature enabled, as it enhances security.
- Keep Software Updated: Regularly update both the client and server software to incorporate the latest security changes. Ensure that the Remote Desktop clients on other systems are also up to date to avoid any security issues.
By following these precautions, you can establish a secure RDP connection and minimize the risk of unauthorized access.
Network Range Scanning
To locate computers by network range, Remote Desktop offers a feature that allows users to query a range of IP addresses. This method is particularly useful when searching for clients outside the local subnet but within the local area network. Here’s how you can perform a network range scan using Remote Desktop:
- Open Remote Desktop and select a scanner in the sidebar of the main window.
- Choose “Network Range” from the pop-up menu.
- Specify the beginning and ending IP addresses of the range you want to scan.
- Click the “Refresh” button to initiate the scanning process.
- Drag and drop the discovered computers to a computer list, such as “All Computers.”
This feature enables administrators to easily locate and manage client computers within a specified IP address range.
Importing IP Address Ranges
In addition to manually specifying IP address ranges, Remote Desktop also allows users to import IP address ranges from a text file. This method streamlines the scanning process and facilitates the management of multiple IP address ranges. Here’s how you can import IP address ranges in Remote Desktop:
- Prepare a text file containing IP address ranges in the format “192.168.0.1–192.168.3.20” or similar.
- Open Remote Desktop and select a scanner in the sidebar of the main window.
- Choose “Network Range” from the pop-up menu.
- Instead of manually specifying IP addresses, click on the “Import” button.
- Navigate to the location of the text file containing the IP address ranges and select it.
- Remote Desktop will import the IP address ranges and initiate the scanning process.
By utilizing this feature, administrators can efficiently manage and scan multiple IP address ranges without the need for manual input.
Enabling Remote Management on Client Computers
To manage a client computer remotely, it is necessary to enable remote management on the respective device. This process can be done by accessing System Preferences on each client computer. Here’s how you can enable remote management on client computers:
- On the client computer, click on the Apple menu and select “System Preferences.”
- If prompted, enter the name and password of a user with administrator privileges.
- In the System Preferences window, locate and click on the “Sharing” option.
- If necessary, click on the lock icon and authenticate to make changes.
- Select the “Remote Management” checkbox to enable remote management for the computer.
- Customize the preferences to restrict access, define user privileges, or require a password to control the screen.
Enabling remote management allows administrators to define who has access to the client’s computer, ensuring secure and controlled remote management capabilities.
Disabling Remote Management via the Command Line
In certain cases, it may be necessary to disable remote management on a client computer. This can be achieved through the command line using the kickstart tool. Here’s how you can disable remote management using the command line:
1. Access Remote Desktop and Enter the Following Command in the Command Line:
sudo/System/Library/CoreServices/RemoteManagement/ARDAgent.app/Contents/Resources/kickstart -deactivate
2. Authenticate With an Administrator Account When Prompted:
Disabling remote management via the command line ensures that previously available logins are denied, effectively disabling remote access to the client computer.
Conclusion
By following this comprehensive guide, users can leverage RDP clients on Mac and macOS devices to establish secure and efficient remote connections to Windows PCs. Whether for remote work, technical support, or system administration, RDP offers a seamless solution for accessing and controlling remote resources.
People Also Ask:
Q: Is it possible to establish an RDP connection from a Mac to a Windows PC?
A: Yes, by using an RDP client such as the Microsoft Remote Desktop app, Mac users can connect to Windows PCs and gain complete access to their resources.
Q: Can I enable Remote Desktop on a Windows 10 Home edition?
A: No, Windows 10 Home Edition does not support running as an RDP server. It can only be used as a client to connect to other Windows Remote Desktops.
Q: Are there any security measures I should consider when using RDP?
A: Yes, it is important to use strong passwords, enable Network Level Authentication, and keep the RDP client and server software updated to ensure a secure connection.
Q: Can I scan a network range to locate client computers using Remote Desktop?
A: Yes, Remote Desktop provides the ability to query a range of IP addresses and locate client computers within that range.
Q: Can I import IP address ranges in Remote Desktop for scanning purposes?
A: Yes, Remote Desktop allows users to import IP address ranges from a text file, making it easier to manage and scan multiple IP ranges.


